 |
Useful Answers |
|---|
| PSM Downloads --> Configuring the eClinical Client Software |
|
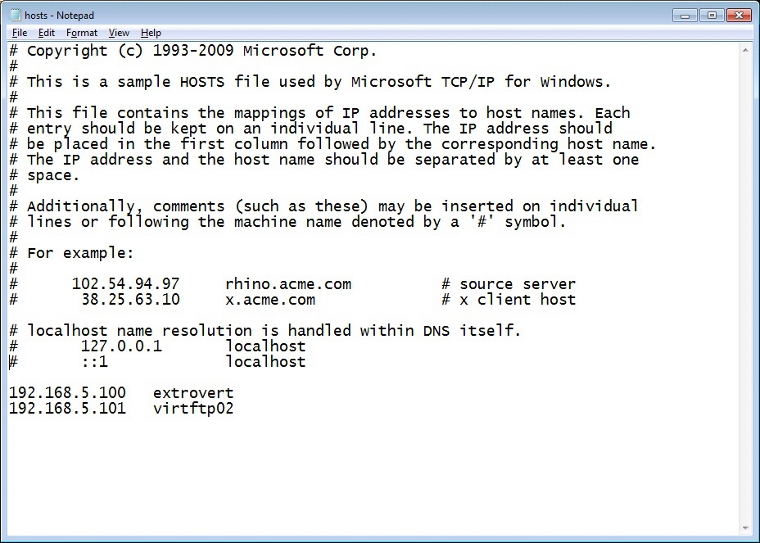
Configuring the eClinical Client Software This document describes the configuration of the eClinicalWorks client to access PSM's data center. 1.) Log in as the local administrator (pc-name\Administrator). 2.) Add entries in the hosts file to resolve server names at the datacenter: a.) c:\windows\system32\drivers\etc\hosts b.) 192.168.5.100 extrovert c.) 192.168.5.101 virtftp02

3.) Modify the configuration.xml file tags to match the entries below, replacing xxx with your site #. The files are: C:\Program Files\eClinicalWorks\configuration.xml (on a 32-bit Machine) C:\Program Files (x86)\eClinicalWorks\configuration.xml (on a 64-bit machine). <server>extrovert:3xxx</server> <ftpserver>virtftp02</ftpserver <ftpuser>sitexxx</ftpuser> <ftppwd>call for password</ftppwd> The ftp tags are ignored by eClinicalWorks when the LoadFTPConfigFromServer itemkey is set to 'yes'. 4.) Configure the ODBC entry. a.) Run
b.) Select the eClinicalWorks entry under the System DSN tab and click Configure. c.) Make the following edits, replacing xxx with your site #. i.) TCP/IP Server: extrovert ii.) Port: 5xxx iii.) User: sitexxx iv.) Password: (Dial 775-885-2211 and choose option 1, then option 1 from the voice menu. Our helpdesk will provide the password.) v.) Database: mobiledoc_xxx
Configuration is complete, and the client should be able to connect to PSM's data center. Be aware that a data move to PSM's hosting is often accompanied by a version upgrade, so the client may require an upgrade. Please see Updating the eClinical Client Software if an update is required.
|